Are you ready to supersize your laptop screen? Whether you’re looking to boost productivity or enjoy a cinematic experience, connecting your laptop to a monitor is a game-changer! At Nimble Nerds, we’re all about making tech simple and stress-free.
But before that, let us first take a look into the world of laptop-to-monitor connections!
The Port Patrol: Your Laptop’s Connection Gateway
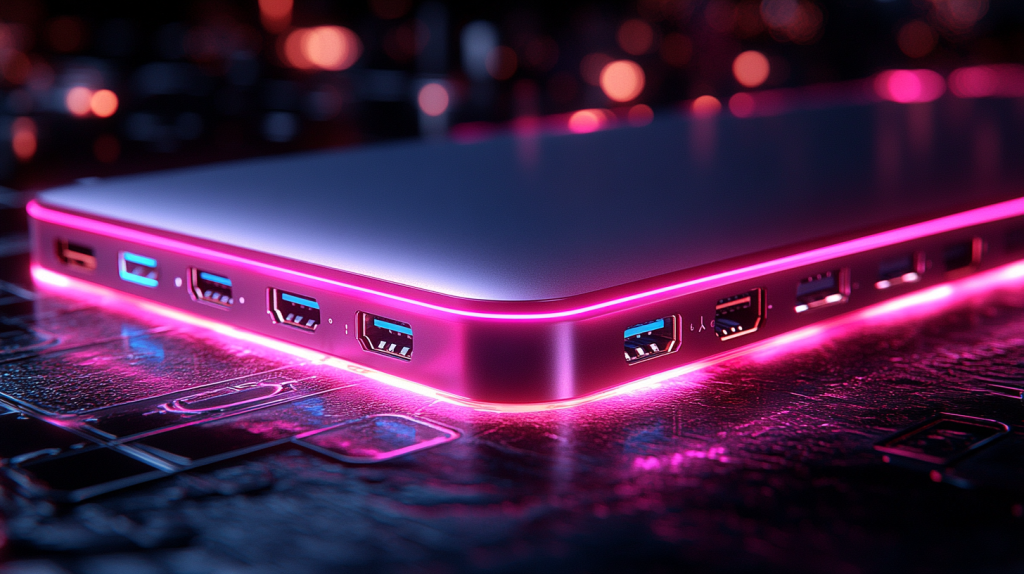
Cable ports play an important role as they mainly connect your computer to other devices- in this case, your monitor. And after spending over a decade helping folks connect their laptops to monitors, I’ve seen it all. The look of panic when someone stares at their laptop’s port on the side panel like it’s written in hieroglyphics. Trust me, we’ve all been there! Those little symbols and ports can look like a mini sci-fi control panel, but I’m going to break this down into bite-sized pieces that’ll make total sense.
If you’re in Sydney and struggling with laptop issues — physical damage, performance slowdowns, or something just not working — we’re here to help. Our technicians can repair, upgrade, or optimise your device without the jargon.
Visit Our Laptop Repairs Service PageConnecting Monitor to Laptop: HDMI Port, DisplayPort, USB-C, and VGA
First up, let’s talk about HDMI ports. You’ve probably seen an HDMI port before; it looks like a slightly flattened rectangle, and it’s the same port you use to hook up your TV devices. Here’s the cool thing: HDMI port carries video AND audio, which means one cable does it all. No more fumbling with a separate audio and video cable like we did in the old days.
While HDMI is typically used generally, DisplayPort is the professional’s choice. It looks similar to an HDMI port but has one angled corner – think of it as HDMI’s sophisticated port cousin. I particularly love recommending this for folks who need crystal-clear 4K displays or want to daisy-chain multiple monitors. Just last week, I helped a graphic designer set up three monitors using a single DisplayPort connection- the look on their face when everything lit up was priceless!
Today, if you’re using a newer laptop, you might see USB C ports– they are those small, oval-shaped ports that work with those reversible cables. But, here’s a pro tip I learned the hard way: not all USB-C ports support video. So if you have one, look for one with a little monitor or lightning bolt icon next to it. This is usually the best bet for these modern setups.
Meanwhile, for those still rocking that older equipment, there’s VGA– the blue port with pins that have been around since the dinosaur era of computers. While it’s not my first choice, it’s still kicking around in many office setups. I keep a VGA cable in my tech kit because, believe it or not, they can be real lifesavers in certain situations.
HDMI Cable Confidential: Matching Your Connection Needs
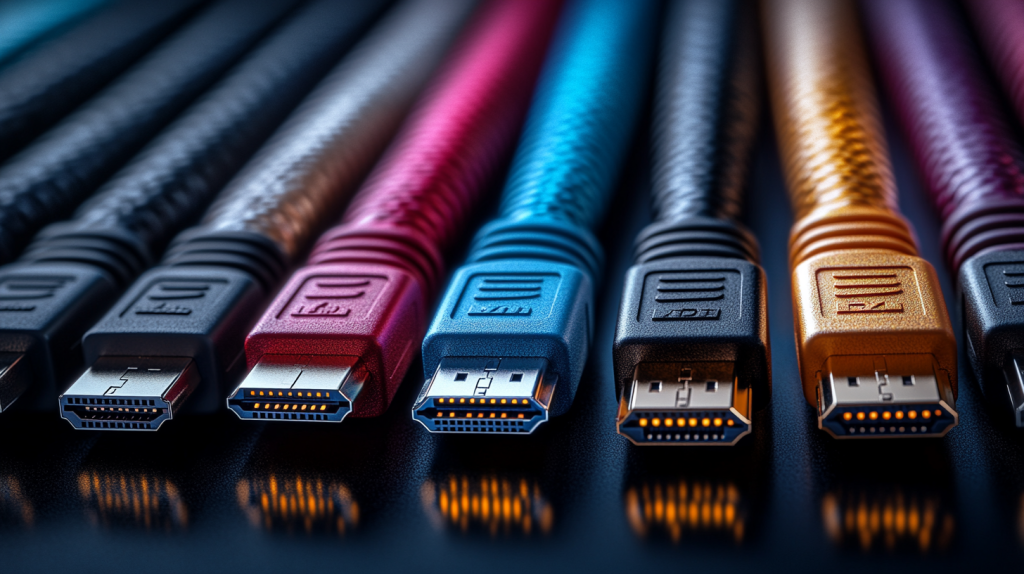
Last month, a client called me in a panic before a big presentation. They’d bought an HDMI cable for their brand-new laptop, only to discover their laptop only had a USB-C port. After rushing to find the right cable, I made it my mission to prevent this situation for others. Let’s break down your cable options so you don’t end up in the same boat!
The Versatile: HDMI Cable
An HDMI cable is a versatile tool when it comes to connections. It can handle both high-quality videos (up to 4k) and audio without any other fussiness. My additional prop tip? Don’t fall for those gold-plated $50 HDMI cables. After working in tech support for fifteen years now, trust me when I say this: you don’t need to splurge on overpriced HDMI cables to get the job done. I’ve never seen a basic HDMI connector/cable fail because it wasn’t “premium” enough. Save your money for a nice coffee instead!
The Advance: DisplayPort
On the other hand, DisplayPort cables are used for their unique features. These may seem similar to HDMI at a glance, but they offer more advanced benefits than HDMI. For instance, they are capable of higher refresh rates, perfect for gamers out there. Additionally, it supports the nifty feature of daisy-chaining monitors together seamlessly! And here’s the kicker; while running displays simultaneously with a DisplayPort cable, it allows you to effortlessly customize resolutions on each screen without any hassle whatsoever! I’ve had my share of experiences setting up workstations for designers who need a 4k monitor for detailing work alongside a standard HD display for their essential tools and menus.
The Newbie: USB-C
Now, the USB-C cable is the new kid on the block, but boy, are they impressive! Just make sure you’re getting one rated for video transfer – each USB C cable is created uniquely. Look for “DisplayPort Alt Mode” in the specifications. I learned this the hard way when I tried using a power cable instead of a video cable for video output. Spoiler alert: it didn’t work!
The Lasting: VGA
For those dealing with older equipment, VGA cables are still hanging around. They’re the blue-ended cables with pins that need to be screwed in (and somehow always end up cross-threaded). While these get the job done, these only carry video signals and top out at lower resolutions. Plus, if you need to connect a modern laptop to an old VGA monitor, you’ll probably need an adapter – keep that in mind before you start your setup.
Getting Connected: An Easy Laptop to Monitor Setup Without Stress

The memory of a client struggling to insert an HDMI cable the right way still makes me shake my head in disbelief to this day – talk about a cringe moment! Let me tell you from experience; connecting and setting up your laptop and monitor should not feel like a Herculean task or an advanced engineering project, by any means! With years of assisting individuals in getting their screens working flawlessly, I’ve honed a safe technique that never fails to deliver results effectively.
Step 1: Power Down for Protection
To begin things- and I can’t stress this enough- make sure the power source is unplugged before connecting the cables. I know you may be tempted to hot-plug everything., but I’ve seen how port failures happen due to “plug and pray”. While modern devices recover more after getting plugged in, it is better to be safe than sorry. Plus, your devices will usually detect each other more reliably with a fresh boot.
Step 2: Making the Connection
Here’s where the magic happens, but don’t rush it! Make sure to check the computer and laptop’s cable ends and ports – they’re shaped to fit only one way. If you’re forcing it, something’s wrong. If you continue connecting the wrong cables, this can result in critical damage to your ports, cable or your device. With HDMI and DisplayPort cable, the wider flat part goes on the bottom. For USB-C, either orientation works (finally, right?). Getting these connections right the first time will save you from the dreaded “No Signal” message that used to haunt my support calls.
Step 3: Powering Up Properly
Now, for the final result! After connecting, turn the power button on your external monitor first, before the power button on your laptop. Doing this will help your laptop detect the external display more reliably. This tip has saved countless clients. Now, once everything is powered up, wait for a few seconds before you power it up.
Step 4: Display Detection Dance
If your screen doesn’t spring to life immediately (and sometimes it won’t), don’t panic! On Windows PC, press Windows + P – that’s your quick-access display menu. For Mac users, hold down the Option key and click the Displays icon in your menu bar. Nine times out of ten, your external monitor is just playing hide and seek, and these shortcuts will help you find it.
Windows Wizardry: Mastering Your Display Settings

After years of walking clients through display settings over the phone (sometimes while they’re squinting at tiny laptop screens), I’ve developed what I call the “foolproof five-minute fix” for Windows PC laptop display configuration. Take a look at the exact process that saved countless frustrated users from display disasters!
Finding Your Way Around
Here’s a shortcut that’ll make you feel like a tech wizard: just right-click anywhere on your desktop and select ‘Display settings.’ Boom! You’re in. Or if you’re feeling fancy, press Windows + I and type ‘display’ – it’s like having a secret passage to exactly where you need to be. Trust me, this beats the old days of clicking through seventeen different Control Panel menus!
Making the Big Decision: Extend or Mirror?
Let me tell you about Janet, a client who was trying to give a presentation while her second screen showed her incoming email notifications to the whole room (oops!). That’s why understanding display modes is crucial. Think of ‘Extend’ as giving your desktop more real estate – like adding an extra room to your house. ‘Mirror’ is exactly what it sounds like – showing the same thing on both screens. For most folks, I recommend extended display – it’s like upgrading from a studio apartment to a two-bedroom!
The Resolution Revolution On Your External Monitor
When it comes to setting up your display, choosing the correct resolution is crucial. This can either make your texts appear sharp and clear or a mosaic art project. While Windows often suggests the resolution for your screen, there are times when it might need a nudge from you to get it right. If things seem fuzzy or oddly stretched on your monitor, consider aligning its resolution with that of your primary monitor – you can easily find this information through a quick online search using your monitor’s model number as a reference point.
Here is another pro tip that helped save my client’s eyesight: if things are smaller on your high-resolution second monitor, don’t adjust the resolution. Instead, adjust the scaling. You can find that in the “Scale and Layout” section and move to 125% or 150%. With this- everything gets bigger and clearer!
Mac Magic: Perfecting Your Display Preferences
After rescuing countless MAc users from their display issues (with one where a client was presenting upside-down to their board of directors), I have some fail-safe tricks to get your Mac display options easily. And believe me, once you know these, you’ll do this like a pro!
The Apple Menu Adventures
Let’s start by adjusting your display settings. To start, click on the Apple menu located in the top left corner of your screen and go to System Preferences, then Displays. Or you can try my go-to shortcut for a move that impresses clients every time; hold down the Option key, and click on the display icon in the menu bar. After that, you have special VIP access to your display settings!
Remember when I mentioned that upside-down presentation? I just wanted to share a trick with you here. If you ever find yourself needing to revert your display to its orientation again in the future, all you have to do is press Command + Option + D on your keyboard. This little tip has helped rescue quite a few presentations from disasters!
Extended Desktop vs. Mirroring on macOS
When it comes to macOS, one of its standout features is its ability to seamlessly expand your desktop upon connecting a monitor most of the time without any hassle. However, there are instances where it may require some intervention from you. In the Displays menu section, you will find an ‘Arrangement’ tab that allows you to rearrange your displays by dragging and dropping them to align with their setup. I often compare this process to arranging furniture in a room. It should be organized in a way that suits your needs and usage best.
One time I assisted a video editor who was puzzled by the disappearance of their mouse cursor on the screen. It turned out that their display settings were flipped compared to their layout! After a rearrangement in the Display tab, voilà – everything fell into place. It’s fascinating how such small details can greatly impact your day-to-day work routine.
The Magic of Resolution Optimization
When using MacOS, you may have to adjust your screen resolution to fit your needs. To do this, head to the “Display settings” and press down the Option key as you click ‘Scaled’. This will show you all the resolution choices for your monitor to select from with ease! Keep in mind that sticking with “Default for display” is generally recommended unless you have a reason to switch it up.
Pro tip that’s saved many of my clients’ eyes: if you’re using a Retina MacBook with an external display, each screen can have its own scaling settings. This is particularly handy when you’re dealing with displays of different sizes or when you need to make text more readable on your primary monitor while keeping things sharp on your second monitor.
Tech Support Triple Zero: Solving Your Connection Conundrums
In my years of tech support, I’ve probably solved enough monitor issues to fill a book (working title: “Why Is My Screen Black?”). Let me share some real life fixes that have saved countless clients from the brink of tech-induced panic attacks. These aren’t just theoretical solutions – these are battle-tested fixes that work!
When Your Monitor Plays Hide and Seek
Have you ever experienced that sinking feeling when you hook up everything and… nothing happens on the other end? Well first don’t freak out – here’s a trick that has saved me loads of times; unplug the cable from both ends, connect nothing for a while; wait for 10 seconds, and then plug everything back in. It’s like giving your devices a break. Sometimes that’s just what they need!
If that doesn’t do the trick here’s a tip I rely on; try pressing the Windows key + P ( for Windows PC) or Command key + F1 (for Mac) a couple of times to refresh things up a bit for your computer’s second screen setup reminder!
Driver Drama: The Silent Troublemaker
Last week, I helped a client whose monitor worked perfectly until they installed a Windows update on their computer. Classic driver drama! Here’s the fix: right-click your desktop, select the ‘Display settings,’ scroll down to ‘Advanced display settings,’ and click ‘Display adapter properties.’ Under the ‘Driver’ tab, if you see anything wonky (like “Generic PnP Monitor”), it’s time for an update.
Pro tip: Before downloading drivers from random websites (please don’t!), check your monitor manufacturer’s website. I’ve seen too many computers infected with malware from sketchy driver download sites. Trust me, that’s one headache you don’t want!
The Resolution Rebellion

Sometimes your screen looks like it’s trying to impersonate funhouse mirrors – everything’s stretched or squished. Nine times out of ten, this is a mismatch between your monitor’s native resolution and what your computer thinks it should be. I always tell clients to Google their monitor’s model number and “native resolution” – match those numbers in your display settings, and voilà!
HDMI Audio Antics
And then there’s the classic “I can see but can’t hear” problem with the HDMI connector. Here’s a trick that’s saved many movie nights: right-click the speaker icon in your taskbar, select ‘Sound settings,’ and make sure your HDMI display is selected as the output device. Sometimes Windows or macOS gets confused about where to send the audio, especially if you’re connecting and disconnecting often.
Power-User Paradise: Maximizing Your Multi-Monitor Mojo
After setting up hundreds of dual-screen workstations (and using one myself for marathon debugging sessions), I’ve collected some game-changing tricks that’ll transform you from a multi-monitor newbie to a screen-spanning superhero. Let me share some real productivity boosters that most people never discover on their own.
Strategic Screen Arrangements
Remember Sarah, the accountant who was constantly losing her mouse between screens? That’s when I taught her about “virtual boundaries” – those invisible walls between multiple displays that can either help or hinder your workflow. Here’s the secret: arrange your screens in your display settings exactly as they sit on your desk. Then, slightly overlap them by about 50 pixels. This creates a “sticky” spot that prevents accidental slips while still making it easy to move between screens intentionally.
Pro tip for numbers folks: put your main spreadsheet on your primary display and reference materials on the second display. Your neck will thank me later! Speaking of which, try to keep both screens at the same height – I’ve seen too many folks develop neck strain from constant up-down head movements.
Keyboard Ninja Moves
Let me share my favorite shortcut that blows clients’ minds: Windows + Shift + Arrow Key. This instantly moves your active window to the other screen. No more dragging and dropping! For Mac users, many don’t know about Control + Command + Arrow keys, which lets you quickly switch between displays. These shortcuts alone have saved my clients countless hours of window shuffling.
Multi-Monitor Magic Tools
While Windows and macOS have decent built-in multi-monitor support, some third-party tools can take your setup to the next level. I’ve had great success recommending DisplayFusion for Windows users who need more control over their workspace. It lets you create custom shortcuts and even save window layouts for different tasks on your monitor. Make sure to download it from the official websites to avoid further problems caused by lookalike sites.
Ever tried using PowerToys’ FancyZones? It’s like having a professional window organizer for your laptop or computer screens. You can create custom layouts that let you snap Windows into precise positions. I use this daily to keep my coding on one screen while documentation and testing tools stay organized on the other.
Monitor Setup Calculator
Big Screen Brilliance: Mastering TV and Projector Connections

After years of rescuing presentations (including one memorable emergency call five minutes before a wedding slideshow), I’ve learned that connecting to TVs and projectors comes with its own special set of challenges. But don’t worry – I’ll share the tricks that have saved countless events from technical disaster!
Getting the Big Picture
Here’s something most people don’t realize: TVs and projectors often need different settings than regular monitors. I remember helping a client whose presentation looked perfect on their laptop but turned into a blurry mess on the other end of the conference room projector. The fix? Make sure your output resolution matches what your display device can handle. For most modern TVs, 1080p (1920×1080) is your sweet spot, while many projectors still work best at 720p.
Pro tip: Before any important presentation, press Windows + P (or hit Command + F1 on Mac) and select “Second screen only.” This keeps your private notifications from popping up in front of the whole room. Trust me, I’ve seen enough embarrassing email previews appear during presentations to make this a standard recommendation!
Sound Strategy
The trickiest part when you connect your TV monitor to your laptop or desktop isn’t usually the video connection – it’s the audio! Here’s what I always tell clients: if you’re using HDMI, check your sound output settings on your device right after connecting. On Windows desktop, right-click the speaker icon and make sure the TV is selected as the output device. For Mac computer, hold Option while clicking the sound icon in the menu bar – it’ll show you all available audio outputs.
A lifesaving tip I discovered during a client’s movie night crisis: some TVs need you to enable “HDMI-CEC” in their settings to handle the audio system properly. It might be called something different (like Anynet+ on Samsung or BRAVIA Sync on Sony), but enabling this usually solves those mysterious “I can see but can’t hear” situations.
Projector Perfect

Projectors can be particularly finicky beasts. My golden rule? Always do a test run before any important presentation. And here’s a trick that’s saved many a presenter: carry both HDMI and VGA cables. You’d be surprised how many “modern” conference rooms still only have a VGA connector prepared. I’ve seen too many panicked faces when someone shows up with only an HDMI connector to count!
If you’re in Sydney and struggling with laptop issues — physical damage, performance slowdowns, or something just not working — we’re here to help. Our technicians can repair, upgrade, or optimise your device without the jargon.
Visit Our Laptop Repairs Service PageFrequently Asked Questions
Simply connect your cable (HDMI, DisplayPort, or USB-C) to both laptop and monitor, power them on, and press Windows + P or use the Displays settings in System Preferences. Select your device and preferred display mode – either extend or mirror. If nothing shows up, try the trusty “unplug and replug” method I mentioned earlier!
First, check your laptop’s video output capabilities. Most modern laptops can handle two monitors through multiple ports or daisy-chaining (with DisplayPort). Connect one monitor at a time, power up, and configure each in your display settings. For best results, use the same type of connection (like HDMI or mini DisplayPort out) for both if possible.
Your laptop or computer sends video (and sometimes audio) signals through its output ports (HDMI, DisplayPort, USB-C) to the monitor’s input ports. The monitor then displays this signal. Think of it like a digital pipeline – the cable is just the messenger between your devices.
Press Windows + P on Windows or access Display settings on Mac, then select “Mirror these displays.” This makes both screens show the same content – perfect for presentations or when you need to share your screen.
Try my three-step troubleshooting method: 1) Check cable connections, 2) Restart both devices, 3) Manually click detect displays, (Windows key + P for Windows, or System Preferences > Displays on Mac). If that doesn’t work, try a different cable or port.
Absolutely! Your desktop or laptop’s keyboard and trackpad will work regardless of display configuration. For extra comfort, consider connecting an external of these devices – your wrists will thank you later!
Yes, both works perfectly. However, using a mini DisplayPort cable generally supports higher refresh rates and resolutions. Meanwhile, an HDMI is more commonly used and handles audio well. So remember, a basic HDMI connector also works well similarly with those “premium” ones!
At Nimble Nerds, we are ready to help you if you get stuck! Technology can be overwhelming, but the right guidance can help you master it. That’s why, don’t hesitate to reach out to us for personalized support- we’re ready to chat with you and help you turn your display dilemmas into display victories!


